


There are several methods employed by DAC designers to process user input commands and the incoming
digital data stream. Some designs rely on hardwired connections with a fixed functionality, whilst others rely
on software control that is either fixed, or can be updated or amended.
The latest generations of Beresford Digital to Analogue Converters use both hardware and software in order
to get the best our of the DAC. This allows us to update a DAC quite easily in order to perhaps solve a
technical issue, or give the DAC a performance boost.
Firmware only modifications
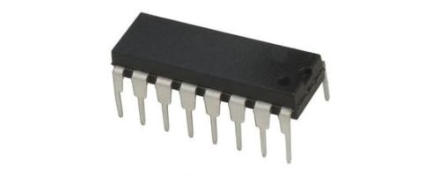
TC-7530DC
TC-7533
TC-7534
TC-7535 & TC-7534
Fitting instructions:
1. Undo the four screws at the side of the case. There are two each side.
2. Remove the top cover of the DAC.
3. Look for the chip in the socket on the PCB right behind the LEDs.
4. Use a thin flat bladed screw driver to carefully lift the chip up half way on one end then half way the other
end. Then repeat the procedure.
5. Remove the new chip from the plastic holder by using a flat blade screwdriver to push the chip out of the
plastic holder.
6. Remove the aluminium foil from the chip, making sure not a single piece remains stuck to the chip.
7. Make sure that you fit the chip the right way round. The writing on the two chips should be the same way
round when you do the swap over. The writing goes from left to right.
8. Remove old chip and replace with new one.
9. Put the original chip in the plastic holder that the new chip came in. Then put that away safely in case you
need to revert back to it. My suggestion is to cellotape it to the side of the inside of the top case. But if you do
that, dispose of the aluminium foil so that it doesn't accidentally short out anything inside the DAC.
10. In case you are not sure of something, get back to us for help before continuing!
Firmware


Firmware

There are several methods employed by DAC designers to process user input commands
and the incoming digital data stream. Some designs rely on hardwired connections with a
fixed functionality, whilst others rely on software control that is either fixed, or can be
updated or amended.
The latest generations of Beresford Digital to Analogue Converters use both hardware and
software in order to get the best our of the DAC. This allows us to update a DAC quite
easily in order to perhaps solve a technical issue, or give the DAC a performance boost.
Firmware only modifications
TC-7530DC
TC-7533
TC-7534
TC-7535 & TC-7534
Fitting instructions:
1. Undo the four screws at the side of the case. There are two each side.
2. Remove the top cover of the DAC.
3. Look for the chip in the socket on the PCB right behind the LEDs.
4. Use a thin flat bladed screw driver to carefully lift the chip up half way on one end then
half way the other end. Then repeat the procedure.
5. Remove the new chip from the plastic holder by using a flat blade screwdriver to push
the chip out of the plastic holder.
6. Remove the aluminium foil from the chip, making sure not a single piece remains stuck
to the chip.
7. Make sure that you fit the chip the right way round. The writing on the two chips should
be the same way round when you do the swap over. The writing goes from left to right.
8. Remove old chip and replace with new one.
9. Put the original chip in the plastic holder that the new chip came in. Then put that away
safely in case you need to revert back to it. My suggestion is to cellotape it to the side of
the inside of the top case. But if you do that, dispose of the aluminium foil so that it
doesn't accidentally short out anything inside the DAC.
10. In case you are not sure of something, get back to us for help before continuing!


Firmware

There are several methods employed by DAC designers to
process user input commands and the incoming digital data
stream. Some designs rely on hardwired connections with a
fixed functionality, whilst others rely on software control that is
either fixed, or can be updated or amended.
The latest generations of Beresford Digital to Analogue
Converters use both hardware and software in order to get the
best our of the DAC. This allows us to update a DAC quite easily
in order to perhaps solve a technical issue, or give the DAC a
performance boost.
Firmware only modifications
TC-7530DC
TC-7533
TC-7534
TC-7535 & TC-7534
Fitting instructions:
1. Undo the four screws at the side of the case. There are two
each side.
2. Remove the top cover of the DAC.
3. Look for the chip in the socket on the PCB right behind the
LEDs.
4. Use a thin flat bladed screw driver to carefully lift the chip up
half way on one end then half way the other end. Then repeat
the procedure.
5. Remove the new chip from the plastic holder by using a flat
blade screwdriver to push the chip out of the plastic holder.
6. Remove the aluminium foil from the chip, making sure not a
single piece remains stuck to the chip.
7. Make sure that you fit the chip the right way round. The
writing on the two chips should be the same way round when
you do the swap over. The writing goes from left to right.
8. Remove old chip and replace with new one.
9. Put the original chip in the plastic holder that the new chip
came in. Then put that away safely in case you need to revert
back to it. My suggestion is to cellotape it to the side of the
inside of the top case. But if you do that, dispose of the
aluminium foil so that it doesn't accidentally short out anything
inside the DAC.
10. In case you are not sure of something, get back to us for
help before continuing!